Raised Bed Gardening for Beginners: How to Plan Your First Bed and Actually Harvest Something
Every year, millions of people decide they’re going to start a garden. They buy seeds, watch a few YouTube videos, dig some holes, and hope for the best. By mid-July, the weeds have won, the tomatoes have blight, and the whole thing quietly gets abandoned. By next spring, they’re back on YouTube.
The problem is rarely motivation. It’s method. Traditional in-ground gardening asks a beginner to work with whatever soil is already there — often compacted clay, sandy subsoil, or ground that hasn’t been amended in decades. You’re fighting the dirt before you ever fight a weed.
Raised bed gardening sidesteps that fight entirely. You build a frame, fill it with good soil, and start with conditions that most in-ground gardeners spend years trying to achieve. A 2019 Iowa State study found that raised beds filled with a quality soil mix produced 1.3 to 2 times the yield per square foot compared to unimproved native soil in the first two growing seasons [1]. That’s not a marginal advantage. That’s the difference between a garden that produces dinner and one that produces guilt.
Why Raised Beds Work for Beginners
The advantages are structural, not magical. Raised beds solve the specific problems that cause most beginners to fail.
You control the soil. The number one reason gardens underperform is poor soil. Raised beds let you start with a purpose-built soil mix — typically a blend of topsoil, compost, and a drainage amendment like perlite or aged bark. You skip the years of amending native ground and start with soil that drains well, holds moisture, and is rich in organic matter from day one [2].
Better drainage, faster warming. Raised beds drain faster than ground-level plantings because gravity pulls water down through the elevated soil column. This means fewer problems with root rot during wet springs and faster soil warming in early spring — which translates to a longer growing season and earlier planting dates [3].
Less weeding. Dense planting techniques in raised beds shade out weed seeds, and the elevated soil profile means fewer weed seeds migrate up from the native ground below. University of Georgia research found that weed populations decrease over time in well-maintained, mulched raised beds [4].
No soil compaction. Because you never step in the bed, the soil stays loose and aerated. Traditional rows require walking between plants, compacting the soil and restricting root growth. Raised beds keep foot traffic on the paths where it belongs [2].
Higher planting density. Raised beds use intensive planting — often square foot gardening grids — instead of wide rows with wasted walkway space. A 4×8 foot raised bed dedicated to leafy greens can produce 32 to 64 pounds of greens per season. The same square footage in traditional rows would produce significantly less because half the space is pathway [5].
Planning Your First Bed
Most beginners go too big. A single 4×4 or 4×8 foot bed is the right starting size — small enough to maintain without feeling overwhelmed, large enough to grow a meaningful amount of food.
Location. Most vegetables need a minimum of 6 hours of direct sunlight per day, and 8 hours is ideal. Watch your yard on a sunny day and note which areas get full sun from mid-morning through mid-afternoon. Avoid placing the bed under trees (shade plus root competition), near large structures that cast afternoon shadows, or at the bottom of a slope where cold air and water collect.
Dimensions. Keep the width at 4 feet or less so you can reach the center from either side without stepping in. Length is flexible — 4 feet, 8 feet, 12 feet, whatever fits your space. For depth, 10 to 12 inches is the sweet spot for most vegetables. Leafy greens and herbs can get by with 6 inches, but tomatoes, peppers, and root vegetables want the full 12 [1].
Materials. Untreated cedar and redwood are the gold standard — naturally rot-resistant and chemical-free. Douglas fir is cheaper but lasts 3 to 5 years instead of 10+. Galvanized steel and composite boards are increasingly popular and last essentially forever. Avoid pressure-treated lumber for food gardens (modern treatments are safer than old CCA-treated wood, but many gardeners prefer to avoid them entirely) and never use railroad ties.
Soil mix. The classic raised bed recipe is roughly one-third topsoil, one-third compost, and one-third aeration amendment (coarse perlite, vermiculite, or aged pine bark). Buy from a bulk landscape supplier if you’re filling a large bed — bagged soil from a hardware store works but costs significantly more per cubic foot.
What to Plant First
The temptation is to plant everything. Resist it. A first-year raised bed should focus on crops that are forgiving, fast, and rewarding — plants that produce visible results within weeks, not months.
Tier 1 — Almost impossible to fail: lettuce, radishes, green beans, herbs (basil, cilantro, parsley, chives), and Swiss chard. These germinate quickly, tolerate minor mistakes, and produce harvestable food within 30 to 60 days.
Tier 2 — Reliable with basic care: tomatoes (start with transplants, not seeds), peppers, cucumbers, and zucchini. These need consistent watering and some pest awareness but reward even modest attention with heavy yields.
Tier 3 — Worth it once you have a season under your belt: carrots (they need deep, rock-free soil and patience), brassicas (broccoli, cauliflower, kale — they have specific timing windows and pest pressure from cabbage worms), and melons (they need space and heat).
Spacing matters more than variety. The single most common beginner mistake is planting too close together. Each crop has a specific spacing requirement, and overcrowding leads to poor air circulation, disease, and stunted growth. A 4×8 bed fits 4 to 6 tomato plants, not 12. Check spacing requirements before you plant, not after everything is fighting for light.
Succession Planting: The Trick That Doubles Your Output
Most beginners plant everything on a single weekend in May and harvest everything in a single week in August. Then the bed sits empty for two months.
Succession planting means staggering your plantings every 2 to 3 weeks so you have a continuous harvest instead of a single glut. Plant a row of lettuce this week, another row in two weeks, another in four weeks — and you’ll be harvesting fresh lettuce from June through October instead of all at once in July.
This works especially well for fast-maturing crops: lettuce, radishes, beans, spinach, arugula, and cilantro. For longer-season crops like tomatoes and peppers, succession planting means following an early spring crop (lettuce, spinach) with a summer crop (tomatoes) and then a fall crop (kale, garlic) in the same bed — three harvests from one bed in a single year.
Tracking What You Planted (and What Worked)
Here’s where most gardeners lose value: they don’t write anything down. Next spring, they can’t remember which tomato variety produced well, when they planted it, how long it took to harvest, or what grew in that bed last year (which matters for crop rotation).
A garden log — what went where, when it was planted, when it was harvested, and how much it produced — is the compound interest of gardening. Each season’s data makes the next season smarter. Which varieties outperformed? Which bed had pest problems? Did the beans in Bed 2 fix enough nitrogen that Bed 2 needs less fertilizer this year? You can’t answer any of these without records.
How DwellPulse Helps
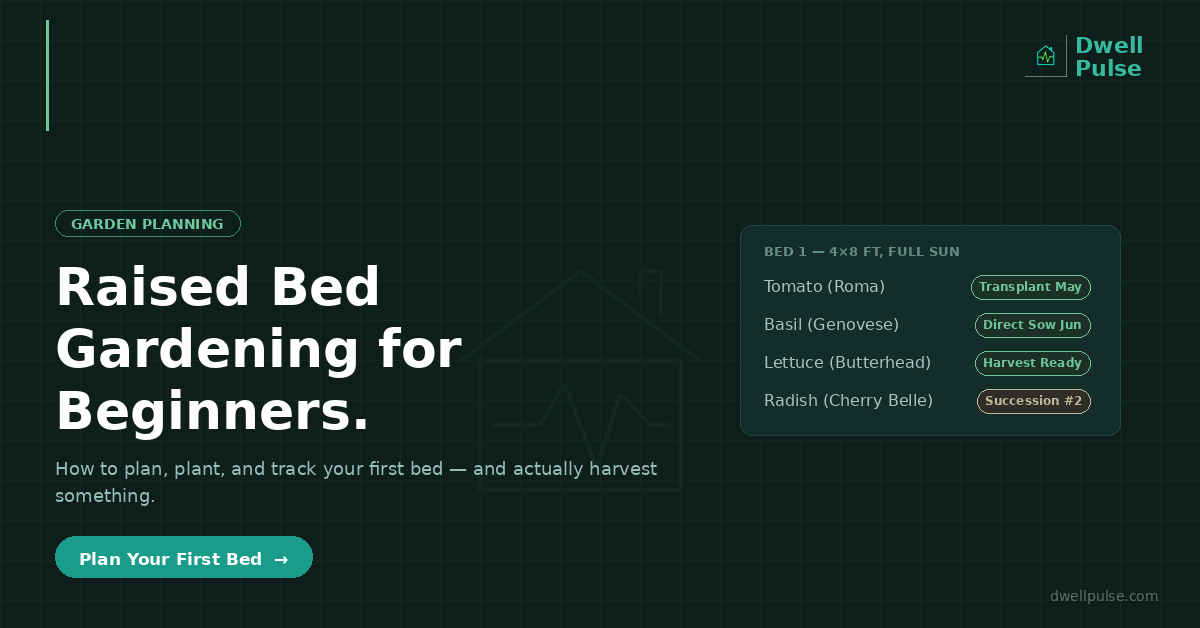
DwellPulse’s garden module is built around individual beds — exactly how raised bed gardening works in practice. Add each bed with its dimensions, sun exposure, and soil depth. The Planting Calendar generates zone-specific planting dates tied to your local frost dates, so you know exactly when to start seeds indoors, when to transplant, and when to direct sow — no guesswork.
Track every planted crop at the bed level: variety, planting date, spacing, growth stage (from planning through planted, germinated, seedling, vegetative, flowering, fruiting, and harvest), and actual yield. The AI Garden Planner suggests what to plant based on your zone, bed dimensions, and the time of year. Use succession planting intervals from the built-in plant database to stagger your plantings automatically. Log harvests as they come in so you have real yield data to compare across seasons.
The Plant Explorer gives you access to a full database with spacing, sun, water, and companion planting data for hundreds of vegetables, herbs, and flowers — all filtered to your USDA zone. And when the season ends, your bed-by-bed history is saved so next year’s planning starts with actual data instead of memory.
[
Plan your first raised bed →](https://app.dwellpulse.com)
Sources: [1] Blooming Expert, “Raised Bed vs In-Ground Garden,” April 2026, citing Iowa State University 2019 study: 1.3 to 2x yield per square foot in first two growing seasons. [2] Alabama Cooperative Extension System, “Raised Bed Gardening,” March 2026. [3] University of Georgia CAES Field Report, “Raised Beds vs. In-Ground Gardens,” August 2025, citing longer growing season and improved drainage. [4] University of Georgia CAES Field Report, “Raised Beds vs. In-Ground Gardens,” noting decreased weed populations in well-maintained raised beds. [5] Anleolife Garden Center, “Raised Garden Bed Yields,” citing 32–64 pounds of leafy greens per 4×8 bed per season.
*Writing assisted by AI
Ready to take control of your home?
DwellPulse is free to start — track maintenance, projects, appliances, and your garden all in one place.
Start Free Today →